Join us as we tackle the queries and questions that no one is asking about hat and coat hooks. Or the questions you secretly want to ask but can’t pluck up the courage to. At Door Controls Direct, we’re here to help - from basic hardware terminology to troubleshooting door closers and access control.
This quick journey through the world of door hooks covers:
- Hardware terminology
- Installation height
- Product spacing
- Fitting hooks
Terminology explained
An innocuous item of door hardware, often snapped, hanging from one screw, only notable when absent - the humble coat hook takes many forms.
Here are the most common variants you’re likely to need or spot in a private residence or commercial washroom:
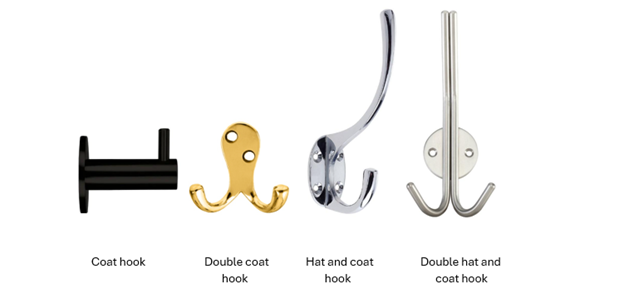
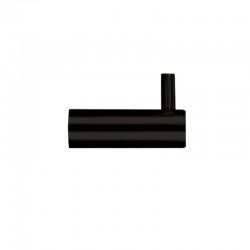
- Coat hook - a single protruding hook that can have a rose, no rose, or a backplate
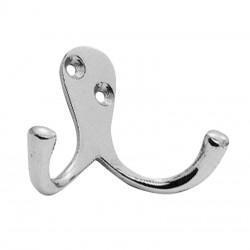
- Double coat hook - as above but with two hooks on the same horizontal plane
- Hat and coat hook - two hooks usually on a backplate, with one hook above the other
- Double hat and coat hook - one hook (hat hook) that sits above a pair of coat hooks
Change the circumstance and you change the thing. A cat to a mouse is a predator, but a cat to a person is a pet. So, what is a coat hook in a bathroom? A robe hook. And a coat hook in a bedroom? A wardrobe hook. They’re all one and the same, the name changing depending on where you fit them.
Multiple hooks can be fixed to a board rather than wall mounted individually. This allows you to hang a coat rack in a hallway or changing area with the same effort as mounting a singular hook (a couple of holes and screws). Hat and coat hooks can be visible face fixing or concealed fixing, with some models having a rubber buffer fixed to the furthest protruding part so it doubles as a door stop.
How high should coat hooks be?
When installing any door hardware you need to consider a building’s users in addition to any regulations. Factor in the construction of the door as this may restrict where hooks can be securely fixed, plus any other installation restrictions such as space behind the door - would the projection of a hook restrict the opening too much?
The Department of Health Core Elements Health Building Note 00-02: Sanitary Spaces details two coat hooks to be fitted in wheelchair and semi-ambulant changing rooms and washrooms. This isn’t due to the volume of belongings to hang but for accessibility. Two hooks - one at 1050mm, and one at 1400mm - allow for ease of access for all within the built environment.
So, when asking how high should a coat hook be, there is guidance for certain use cases however, some consider it best practice to install two hooks at different heights in all bathrooms and changing rooms. This allows for users of differing:
- Heights - no more stretching to the top of the door if you’re short in stature. This could apply to any private or public space.
- Mobility - users with restricted upper body movement would benefit from a lower hook. Think hospitals, retirement properties, or medical facilities.
- Ages - a younger person would more readily reach a lower level hook. So, for primary schools and family friendly facilities.
- Accoutrements - a bag on a lower hook, garments on a higher hook, perfect for changing spaces and washrooms in retail stores, shopping centres, or leisure centres, where individuals are likely to be carrying a lot on their person.
So, in most circumstances, there isn’t a set height so think about accessibility, functionality, and aesthetics, alongside practical elements such as installation, which we touch on below.
How far apart should coat hooks be?
A quick online search will provide you with many and varied suggestions - 10-15cm, 15-20cm, even 30-40cm apart. In commercial installations in changing rooms, hotels, and WCs, you’re likely only to have 1, maximum 2 hooks on a door or wall so spacing doesn’t factor.
You’re likely to encounter this in a multi-occupancy space like an office, or an educational facility. So, if you find yourself needing a multi-hook arrangement and don’t want to install a preassembled multirack, we suggest you consider the following factors when deciding how far apart for coat hooks or any type of garment hooks:
- Quantity of hooks - how many users will the space have at one time or on a shift? Is one hook needed per user?
- Usage - what will typically be hung on the hooks? If clothes hangers are being utilised, the hooks will need to be farther apart.
- Privacy - do users need a little personal space when using the area? So, a larger gap between hooks, or even a partition may be prudent.
- Available space - how many hooks can you realistically accommodate in the space you have?
- Design of hardware - are the arms of the hook spread widely, or project straight out? Aesthetically they may look better closer or farther apart - it’s not just about function.
These factors, plus your own facility-specific requirements will all feed into your decision on how far apart to space your hat and coat, robe, or garment hooks.
Fitting hooks
So far we have covered types of hooks, height, and spacing. Now, let’s get to grips with how to fit them. You’re likely to be installing on a wall or a door, whether from new or replacing a missing or damaged item as part of your regular door maintenance routine, so let us take you through how to attach a coat hook.
You will need to be aware of specifics around installation - what material or surface you are fixing into/onto, what fixings you’re using, and whether it will need to be moved/removed once installed. Also, be aware of the general location - is it in an optimised position/location for users, does it make sense with the building/room layout, and is it likely to damage the wall when the door is opened?
Once you’ve established where the hook needs to be placed - on a plaster wall or hollow door - the initial steps are pretty universal for screw fixing (not self-adhesive) products:
- Assemble the right tools and equipment such as a suitably sized drill bit and wall anchors/plugs.
- Take measurements and mark up the positioning.
Depending on the type of wall or door you’re fixing into, you may need to drill pilot holes. If heavy items will be hung on the hooks you may want specialist plasterboard fixings if you can’t fix to the wall stud work, or hollow door fixings for hollow core doors.
You’re then set up to begin drilling the holes and screwing on the hooks. When installing multiple hooks near to each other, check they are level and in line if fitting one above the other, as we’ve mentioned above.
When retrofitting or replacing, it’s ideal to replace like for like to reuse existing screw holes or fixing points. However, if this isn’t possible, aim for a product larger than the original to cover the old fixings, or there will be some making good to be done before fitting the new hook.

It all hangs on this
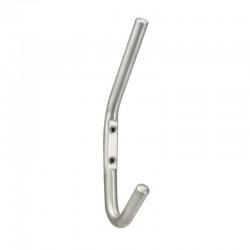
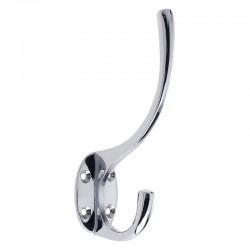
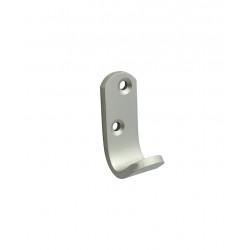
The frequently used, often overlooked hat and coat hook is available in a myriad of different designs - Victorian, contemporary, strip/flat, swan neck, square back, tubular, and a raft of others. With finishes from woodgrain to white plastic, aluminium to antique brass, there is definitely something for every built environment. Whether it is an anti-ligature application, a bathroom in a boutique hotel restaurant, or fitting out a new housing development - there’s a solution for every space.
When shopping for hat and coat hooks make sure to consider:
- Users - their height, what they will hang on the hooks, and mobility
- Setting - what quantity of hooks, their material and robustness, plus the finish and design
- Installation - where they’ll be fitted, to what, fixing types, plus the height and distance apart
Fitting the right hook in the right place makes a space functional, accessible, and compliant. They can also complement the overall look and feel, enhancing the appearance of a room or blending into the background. The choice is yours.
Our expert team is on hand if you need any assistance with hooks, handles, hinges, and more so contact us today: sales@doorcontrolsdirect.co.uk or 01305 263300.






Comments